Bloons TD Tips: Every Tower, Every Bloon, and Where to Put Them
Published · 3 min read
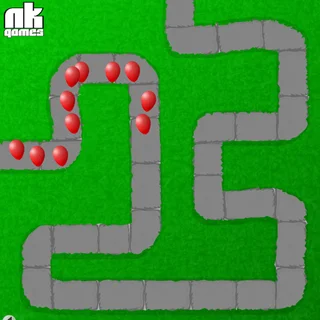
The first Bloons TD looks simple — one track, five towers, one Start Round button — and most players lose somewhere in the yellow waves because they bought the right towers in the wrong places. Here is what every tower does, what every bloon is immune to, and a plan that holds.
The rules in one paragraph
You start with 650 money and 40 lives. Bloons walk the grey path from one edge to the other. Popping one pays you; letting one out costs lives, and a bloon costs as many lives as it has layers — a red costs one, a blue two, a green three, and so on. Sell a tower and you get back 80% of everything you spent on it, upgrades included. That is the whole economy.
The five towers
Dart Monkey. Throws one dart at a time. Cheap, and the backbone of the early game. Its two upgrades are piercing darts, which let a dart pop two bloons, and long-range darts. Piercing is the better first buy: it doubles what the tower does against a line of bloons.
Tack Shooter. Fires a volley of tacks in eight directions. Against one bloon most of the tacks miss; against a crowd, every tack finds something. Upgrade its shooting speed first, then its range, and put it where the path bunches up.
Ice Tower. Freezes everything nearby. A frozen bloon stops moving, but it also can't be popped by darts or tacks. Only a bomb breaks the ice. Its upgrades make the freeze last longer and reach wider.
Bomb Tower. Launches a bomb that pops everything in a small area. Upgrades give bigger explosions and longer range. It is the answer to frozen bloons and big groups — and useless against black bloons, which are immune to bombs.
Super Monkey. A continuous stream of darts that shreds anything in range. It costs far more than the others, so it usually arrives in the middle rounds, once two or three upgraded towers are paying for it.
The bloons
Each colour is faster than the last and hides the previous colour inside: blue holds a red, green holds a blue, yellow holds a green. Then come the two that break strategies. Black bloons are small, slower than yellows, hold two yellows, and ignore bombs. White bloons also hold two yellows and cannot be frozen. The last round sends both together.
A placement plan
- Rounds 1–5: two Dart Monkeys on the inside of the first two bends, then piercing darts on both.
- Before the greens: a Tack Shooter where two stretches of path run side by side, so its tacks cover both. Speed upgrade.
- Before the yellows: an Ice Tower near the middle of the track with a Bomb Tower right beside it. The ice stops them, the bombs pop them.
- Before the black and white rounds: make sure darts and tacks cover the whole path on their own — the bombs won't touch black bloons, the ice won't touch white ones. This is where a Super Monkey on the busiest corner pays off.
Three mistakes that cost the game
Spreading out too early: a second unupgraded tower is almost always worse than upgrading the first. Leaving money in the bank: money in the corner of the screen pops nothing. And ignoring leaks in the early rounds: the waves only get bigger, and a line that leaks reds will leak yellows.
More from the blog
- Ninja Kiwi and the Bloons TD Series: Which One Should You Play?
From a 2007 dart game to Bloons TD 6: who Ninja Kiwi are, what changed from one Bloons TD to the next, and which of the browser versions on this site to start with.